
An aftermarket 'slip-on' exhaust provides a more freely flowing path for the exhaust gases for the purpose of improving engine output. It is called a slip-on because the new midpipe attached to the replacement muffler just 'slips on' over the stock header pipe. Another result is a louder and more pleasing exhaust sound over the more restrictive and quieter stock exhaust. The stock bike is jetted lean at low engine rpm but overly rich at high rpm. A 'race exhaust can' increases the engines breathing ability with the result of leaning out the mixture at all engine speeds. This means that stock jetting will be even more lean at low rpm resulting in softer low rpm performance but the mixture will be improved at mid and high rpm for improved performance in that region. Carburetor rejetting is used to reclaim the lost low rpm power and to fine tune the mid and upper end even more.
After scratching my previous Yosh Tri-Oval in a lowside I decided to go with a high-mount from Dale Walker's Holeshot Performance Products as a replacement. Price was $379. I had always liked the look of that pipe and since I had already removed the stock rear turn signals with the Undertail Modification I was ready for the installation of that pipe.
Here is what comes with the Holeshot slip-on.
 |
 |
| 1600 x 1200 | 1600 x 1200 |
The first step in installing a slip-on is to remove the stock pipe.
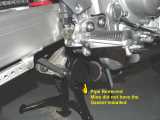
Remove Stock Pipe:
A more detailed alternate description of this procedure can be found
here.
Holeshot Pipe Installation:
Installation starts with the previous pipe removed.
First, remove the right passenger peg assembly.
Next, install the black mounting bracket and reinstall the passenger footpeg assembly. Torque the bolts to 30 Nm, 22 lb-ft.
Carefully install the elbow pipe (midpipe). Push as far forward as possible over the header pipe but
do not tighten the clamp yet. Dale recommends Permatex Ultra Copper High Temp Silicone Seal. I didn't have
that available so I used the High-Temperature Anti-Sieze instead.
Carefully install the muffler can. Watch the orientation of the clamp. Again, do not tighten yet. Rotate so
the end tip points downwards.
Prepare the mounting strap. Remove the adhesive backing from the insulating strip and affix to the
inside of the mounting strap. Remove also the white protective film from the outside of the stainless
steel strap.
Install the mounting strap and secure with the flange bolt. Use blue loctite on the threads and tighten securely.
Slightly rotate the elbow pipe and the muffler as necessary to properly align everything.
Unfortunately, the muffler contacted the Rizoma blinker. Spacing washers on the inside of the mounting bracket
on the rearward footpeg assembly bolt fixed it.
Lastly, securely tighten the lower, and upper clamps. Make sure the footpeg brackets bolts are
tight also (30 Nm, 22 lb-ft). Before starting the engine and heating the pipe, remove any grease and
fingerprints from the stainless steel surfaces with a suitable metal polish.
Installed pictures.
The Holeshot pipe produces a somewhat deeper, throatier sound than the Yosh and is just a bit louder, but not too loud.
The pipe looks great and is of very high quality.
Last Updated: 04-30-2005
Copyright © 2001-05, Patrick Glenn, All Rights Reserved.
The information presented here reflects solely my personal experience with my motorcycle and is presented
for entertainment purposes only. No information presented here is to be relied upon for issues of rider safety
nor to replace the services of a qualified service technician.
Any attempts to follow or duplicate any of these procedures are done so completely at your own risk.
By reading the information on this site, you agree to assume complete responsibility for any and all actual
or consequential damages that may arise from any information presented herein.


1600 x 1200
1600 x 1200
1600 x 1200
1600 x 1200

1600 x 1200

1600 x 1200


1600 x 1200
1600 x 1200
1600 x 1200


1600 x 1200
1600 x 1200
1600 x 1200
1600 x 1200


1600 x 1200
1600 x 1200
1600 x 1200
1600 x 1200

1600 x 1200


1600 x 1200
1600 x 1200
1600 x 1200


1600 x 1200
1600 x 1200
1600 x 1200


1600 x 1200
1600 x 1200
1600 x 1200


1600 x 1200
1600 x 1200
![]()
Back to Main Page
Yamaha® and FZ1® are registered trademarks of the Yamaha Motor Corporation.
This site is not affiliated in any way with the Yamaha Motor Corporation.